1REQUIREMENTS – Back to top
At the basic level, this theme will require the following conditions:
- Apache 2.x or Microsoft IIS 7
- PHP 5.3.x
- MySQL 5.0.4 or higher
- WordPress 3.9+, 4.0+
2KEY FEATURES – Back to top
- Compatible with IE9+, Firefox 4+, Netscape, Safari, Opera 9.5 and Chrome
- Responsive layout for all devices
- WooCommerce included
- Advanced widget options
- Unlimited colors and over 500 Google web fonts
- Allow to set site title, tagline, logo and Analytics ID
- WPML Compatible & RTL Ready
- Support menu with Mega and dropdown style
- Support primary menu location, widget sidebars
- 5 Preset Color Styles: Tomato, Blue, Cyan, Orange and Boocdo.
- Fully integrated with Font Awesome Icon
- Support to add custom CSS/JS
- Social Networks integration
- CSS3 table-less design
- LESS for advanced development
- Custom page templates: about us, contact us…
- Custom style for plugin Contact Form 7 and SEO Plugins to allow higher ranks.
3LAYOUT POSITION – Back to top

4INSTALLATION – Back to top
There are two ways to install a WordPress theme:
Quickstart Installation: By using this package (sw_sport_quickstart_version1.2.1.zip), you will set the theme exactly as our Demo with sample data. This is applied when you need a fresh WordPress with our theme.
Manual Installation: You need 4 files.
- Theme package (sw_sport_theme_version1.2.1.zip) - In the theme package contains both theme file and plugins.
- Data folder contains (sample_data.xml, product.xml, slide.zip).
4.1 Quickstart Installation
Step 1: Extract Quickstart package to your folder >> htdocs >> xampp if you’re using localhost. Or upload all files after extracting as this image if you’re using a hosting server.
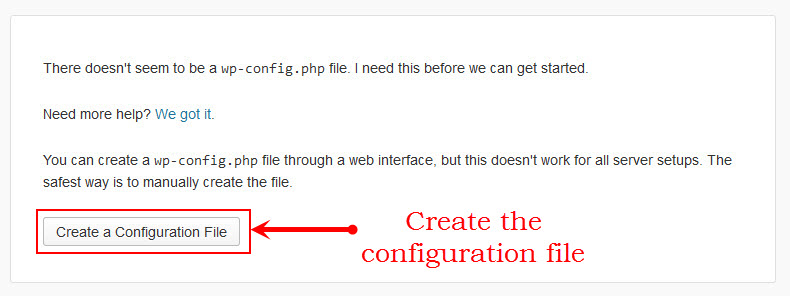
Step 2: Move the directory content into your browsers and start installation. The initial WordPress installation screen will notify you that the configuration file is unavailable. Click Create Configuration File button to create it.
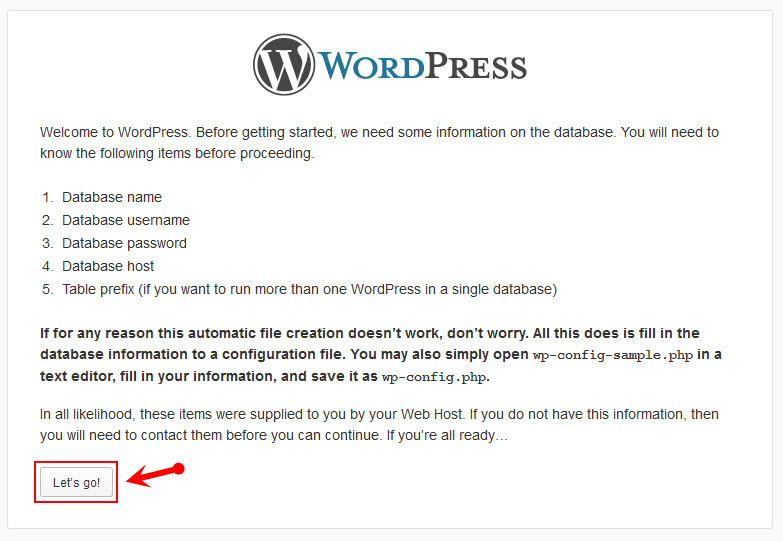
Step 3: You need to setup database if you haven’t got. You can refer the guide how to create a new database and new username for WordPress. Then Let’s Go!
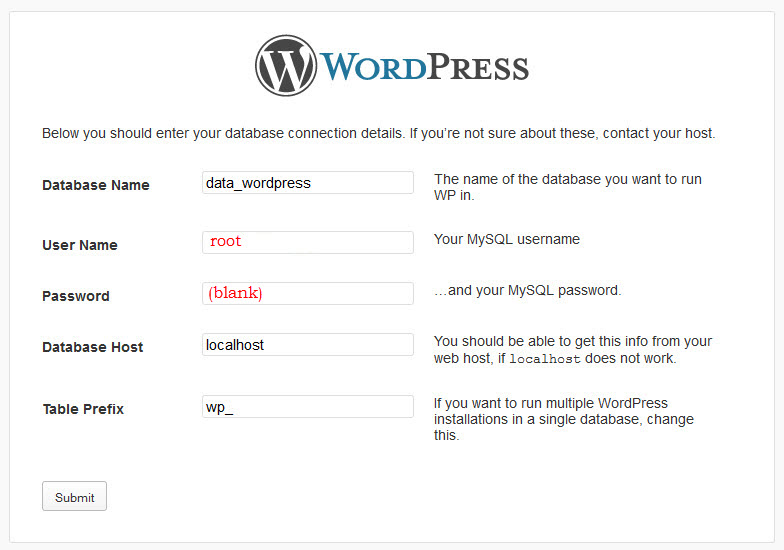
Step 4: Input the WordPress database connection details. With using localhost, you can type the username and password as below:
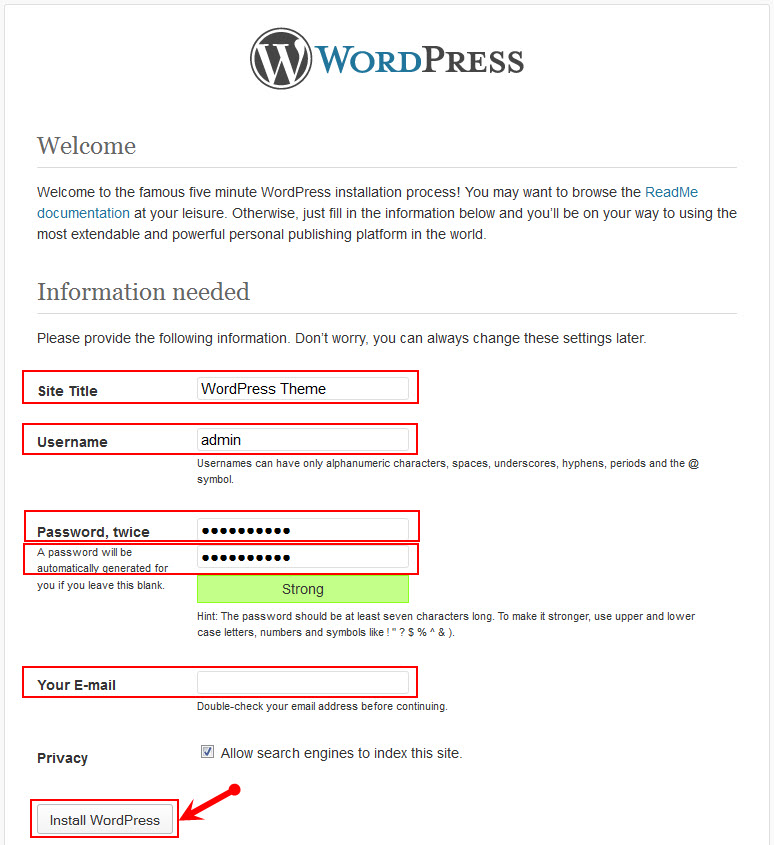
Step 5: Run the installation and edit needed information as following:
Step 6: Complete installation
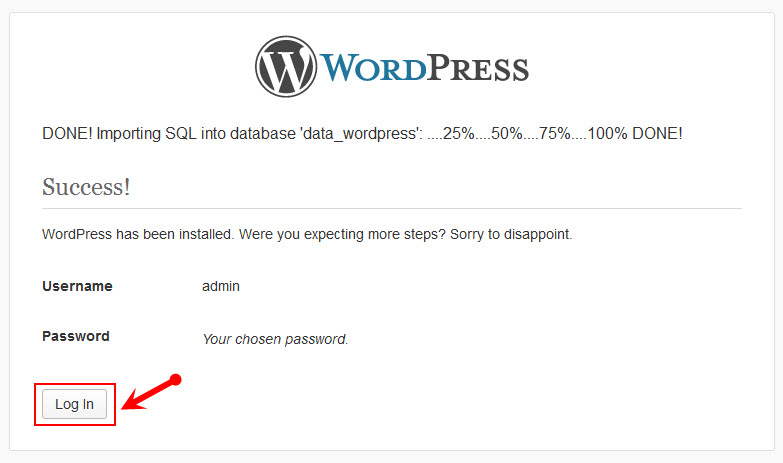
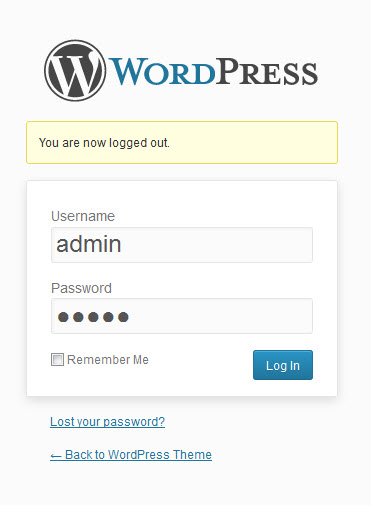
Step 7: Log in your account and discover the new theme
4.2 Manual Installation
4.2.1 Install Theme
To install this theme you must have a working version of WordPress already installed.
Installing this theme is just like any other WordPress theme, either by uploading the main theme folder via FTP (unzipped) or the zipped file via the WordPress theme upload section.
Install Using FTP
- Extract themename_version.zip.
- Load your FTP client, such as FileZilla.
- Upload the themename_version folder to the /wp-content/themes directory.
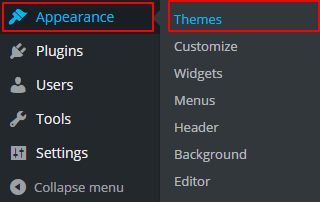
- In the left menu sidebar, go to Appearance >> Themes.
- Click Activate underneath the theme’s named section.
Install Using the WordPress Installer
Login to your WordPress Dashboard and navigate to Appearance >> Themes. At the top of the page click the Add New button.
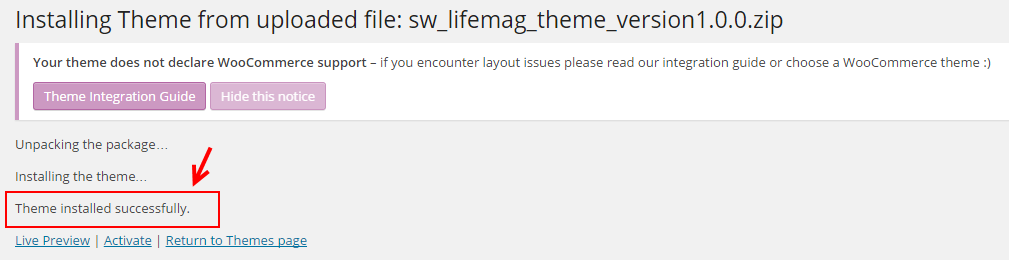
Click the Upload Theme button >> Choose File in Import from your computer section. Navigate to previously zipped theme package and open theme installator folder:
Select your theme .zip file and click Install Now.
Note: If the file size is larger than 8M, please upload to FTP (File Transfer Protocol).
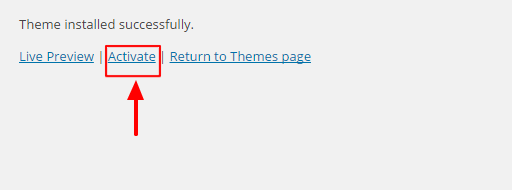
The uploading process will be started. You will see the message that Theme installed successfully.
Click “Activate” to enable theme.
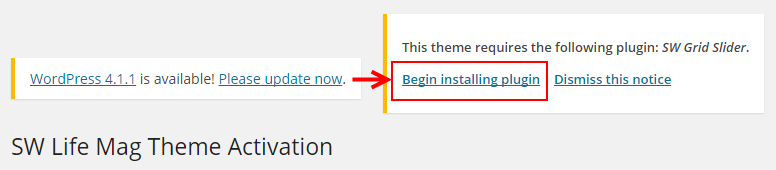
After the theme activated, install plugins by clicking link Begin Installing Plugins. You need to install the following plugin:
Select the plugin >> click list box to select “Install” >> Apply.
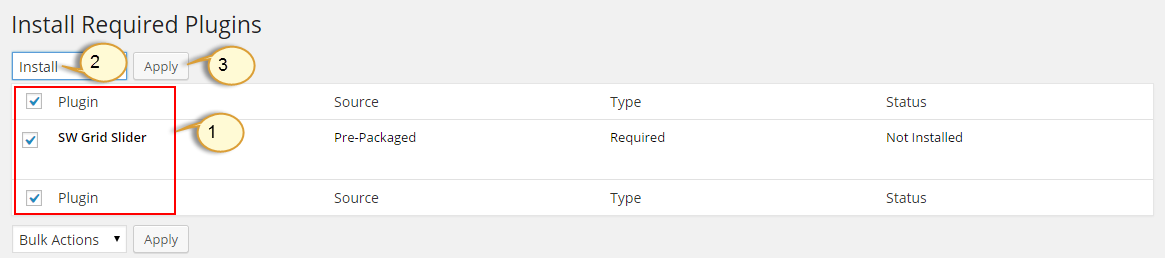
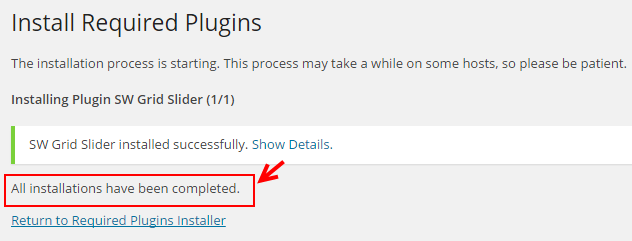
You will see the message that the plugin installed successfully.
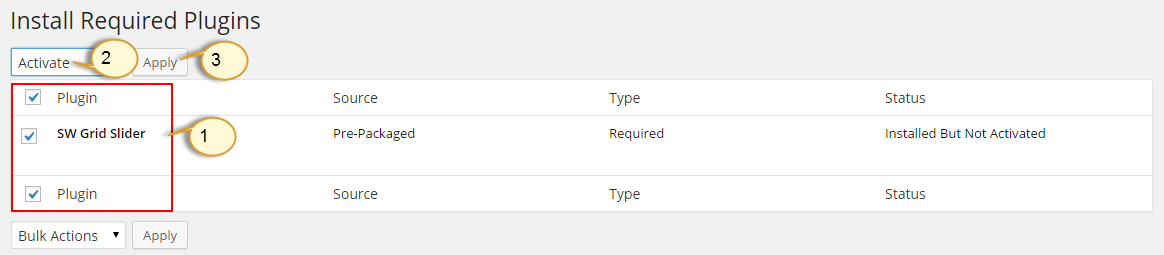
Click “Return to Required Plugins Installer” >> select all plugins >> Active >> Apply.
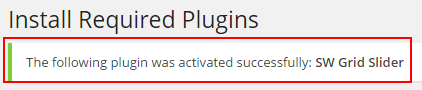
You will see the message that
The plugin was activated successfully.
4.2.2 Install Sample Data & Product
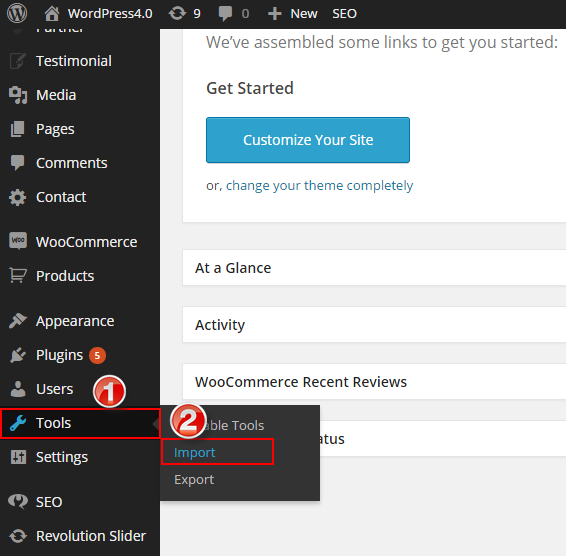
Step 1: In the Administrator page, please navigate to Tools >> Import.
Step 2: Please choose “WordPress” to import.

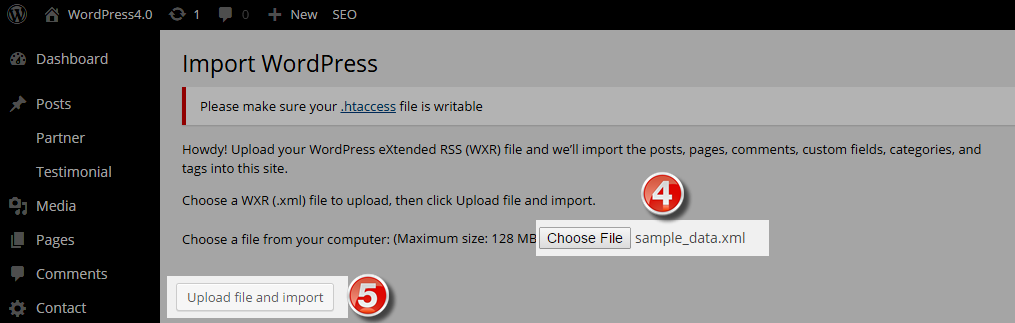
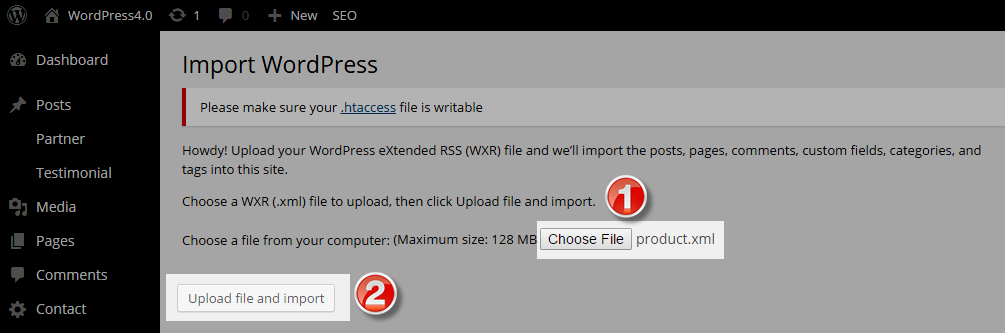
Step 3: In Import WordPress page, click “choose file” button to select file “sampledata.xml” and “product.xml”, one after another to upload.
5 READING SETTINGS – Back to top
In the Administrator page, please navigate to Settings >> Reading >> Front page displays >> select “A static page” >> Front Page “Home” >> Save. This allows the changes to display on the home page.

6CONFIGURATION – Back to top
6.1 How to Configure Theme Options
Let’s go to Appearance > Theme Options for configuration.
General
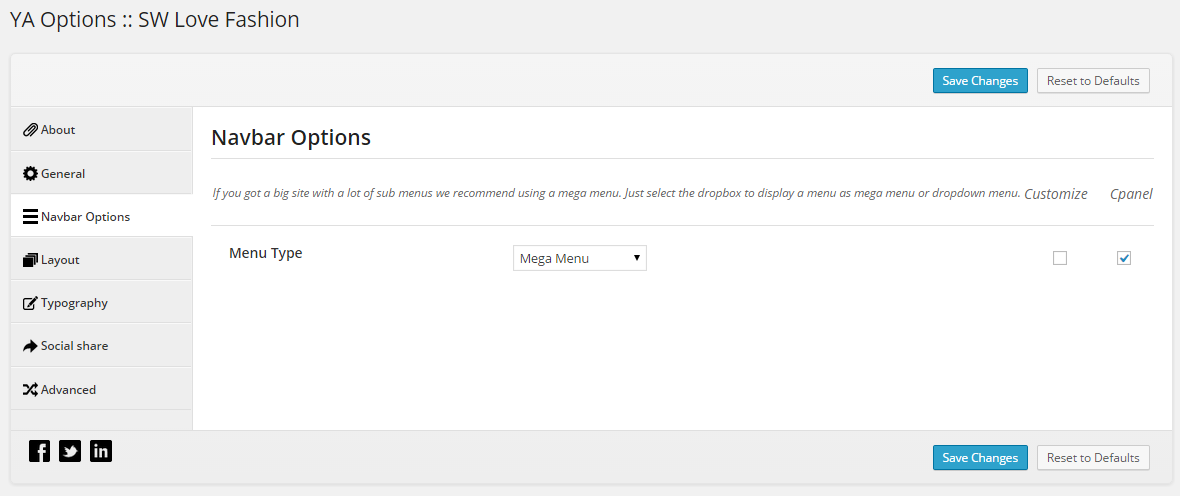
Navbar Options
Layout
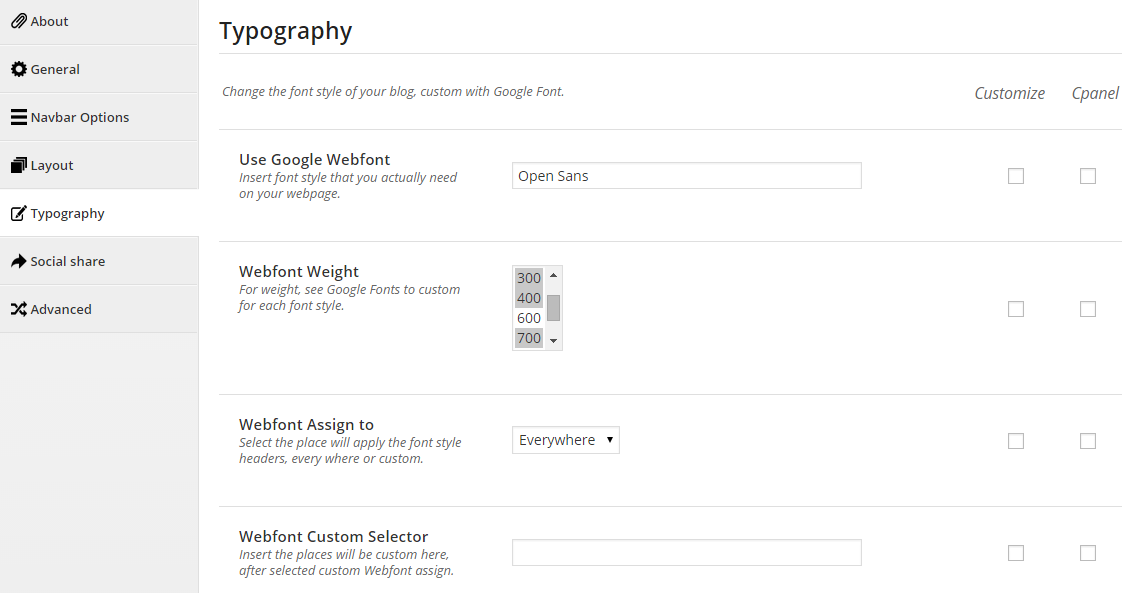
Typography
Social share

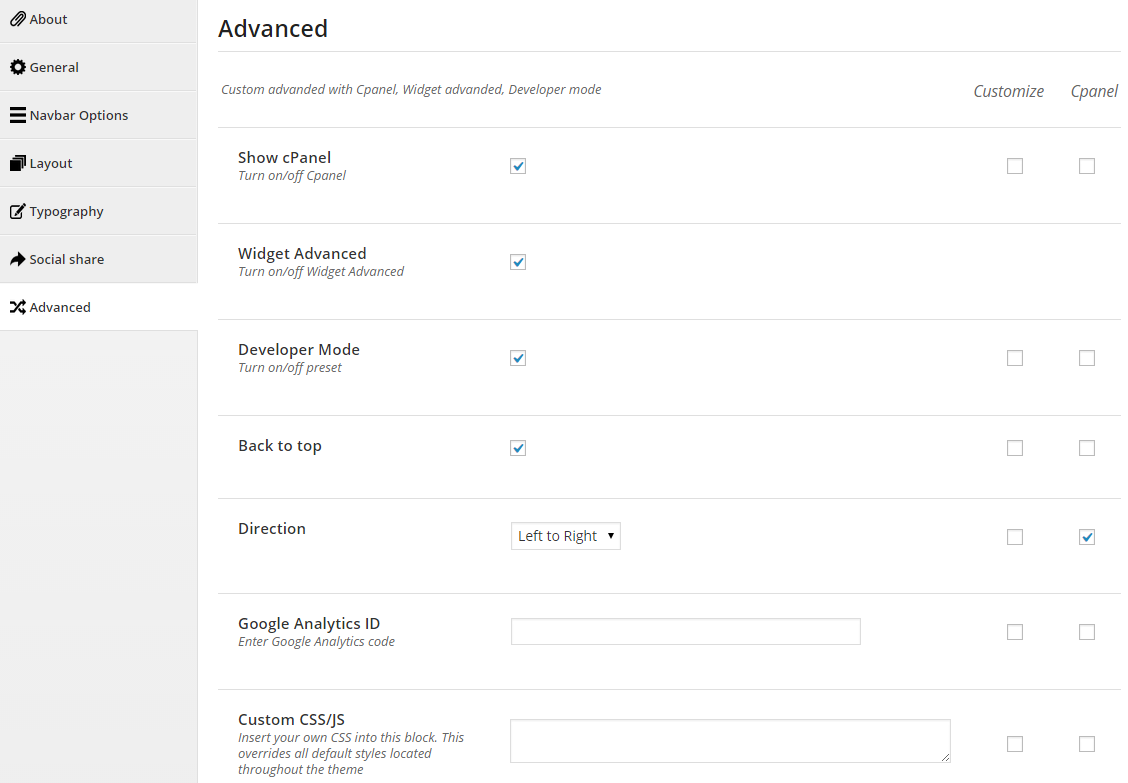
Advanced
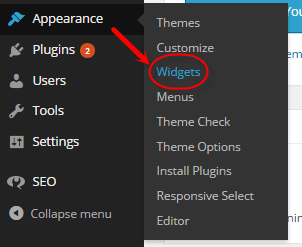
6.2 How to Configure Widgets
Let’s go to Appearance >> Widgets!
You can drag widgets/plugins in the list from left to positions on your right as follow image
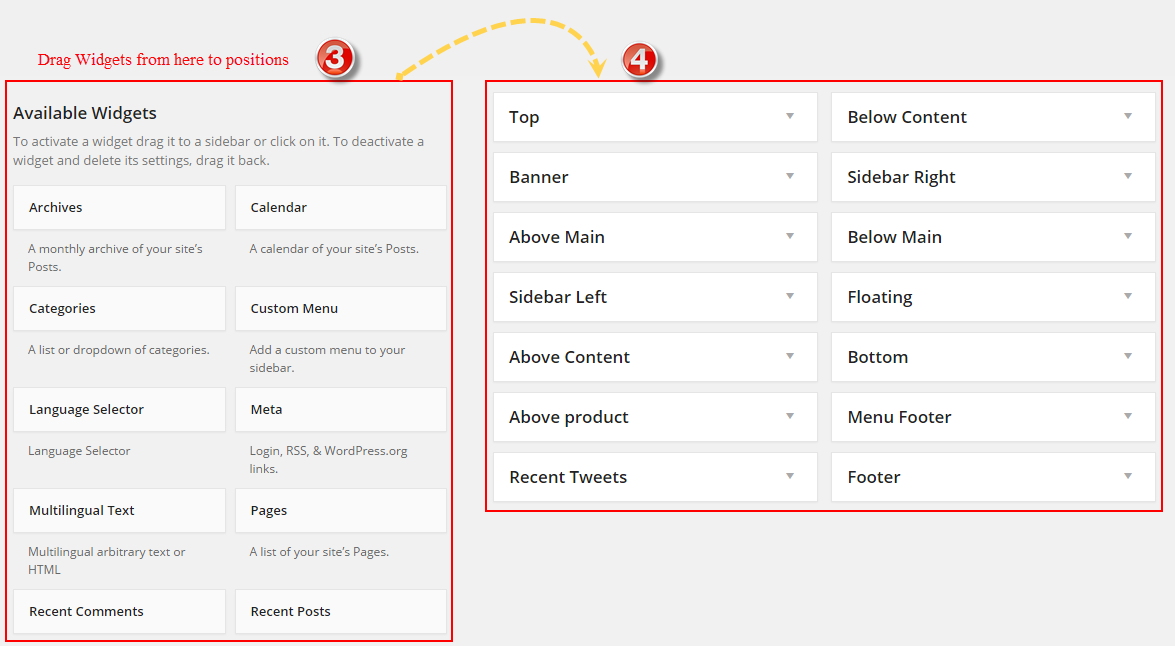
Add widgets in your sidebars and then choose where they will be shown! It has never been so easy to personalize the widgets section!
-
Advanced Options - Support 3 options for your advance
-
Widget Style - Style of widget ( default is selection )
- col-4; col-5- Set the width of the widget will occupy (4/12; 5/12) .
- No-margin- Do not allow to set margin at bottom.
- contact-us, get-help, join, orders - Style for footer column “contact-us, get-help, join, orders”.
- Container- Add a class container into the widget, use for sidebar without container.
- pull-left, pull-right- Allow to align left/right .
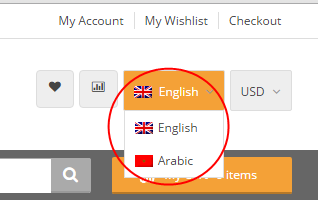
- Language Display - This option is shown only plugin WPML was actived. It allow user can select language to display widget.
-
Widget Display - Option select widget display. There are 3 option:
- All- Widget will display all in theme in the sidebar that’s selected.
- Only on selected- Check into checkbox which you want your sidebar show on that.
- All - The widget will be shown on pages that contains widget’s sidebar
- Except on selected - Allow to choose pages that don’t want to show widget
-
Only on selected - Allow to choose pages that want to show widget
- Users - Allow to be shown for user pages (login/ not login)
- General - Check into the checkbox that you want to show the sidebar( blog, archive…)
- Taxonomy Slugs - Input Taxonomy Slugs of pages that you want to display widget, if have many taxonomies then separate them by “,” mark.
- Posts type - Input Posts type of pages that you want to display widget, if have many posts type then separate them by “,” mark.
- Categories ID & Posts ID - ID of Categories or Posts, if have many IDs then separate them by “,” mark.
- Menu - Allow to choose menu that you want to display widget.
-
Widget Style - Style of widget ( default is selection )
Note: If your theme use WPML, please select Language on admin toolbar before selecting a widget display at sidebar.
5.2.1 Text - Top position
Frontend Appearances:
Backend Settings:
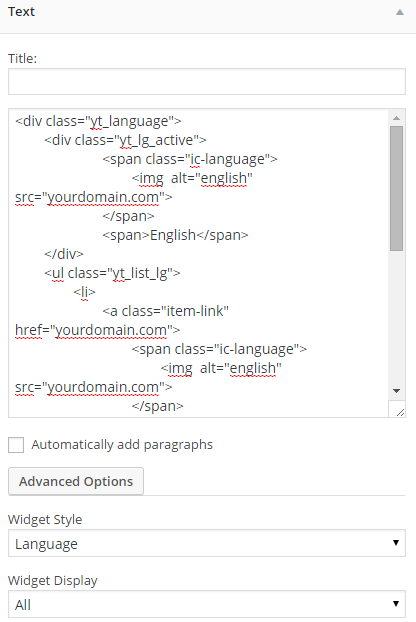
Copy and Paste the Code Custom HTML of Text :
|
1
2
3
4
5
6
7
8
9
10
11
12
13
14
15
16
17
18
19
20
21
22
23
24
|
<div id="lang_sel">
<ul class="nav">
<li>
<a class="lang_sel_sel icl-en" href="#">
<img class="iclflag" title="English" alt="en" src="wp-content/themes/sw_sport/assets/img/en.png">
English
</a>
<ul>
<li class="icl-en">
<a href="[bloginfo]?page_id=1476&direction=ltr">
<img class="iclflag" title="English" alt="en" src="wp-content/themes/sw_sport/assets/img/en.png">
English
</a>
</li>
<li class="icl-ar">
<a href="[bloginfo]?page_id=1476&direction=rtl">
<img class="iclflag" title="Arabic" alt="ar" src="wp-content/themes/sw_sport/assets/img/ar.png">
Arabic
</a>
</li>
</ul>
</li>
</ul>
</div>
|
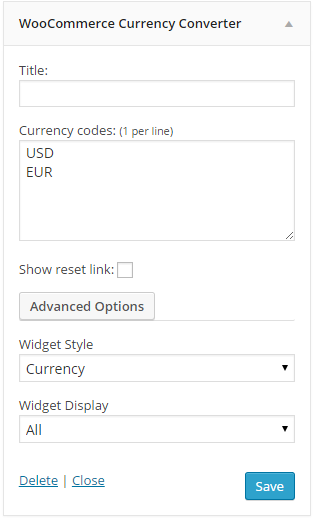
5.2.2 WooCommerce Currency Converter - Top position
Frontend Appearances:

Backend Settings:
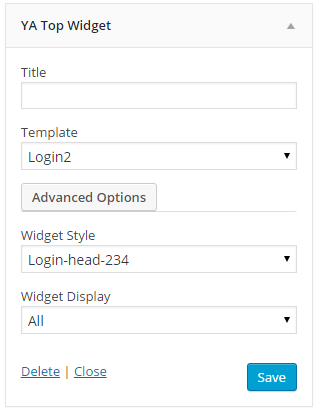
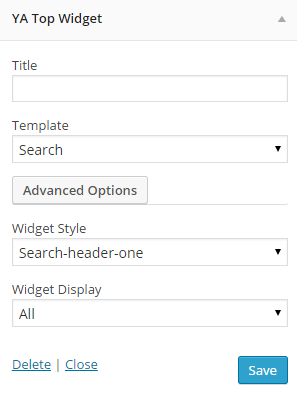
5.2.3 YA Top Widget - Top position
Frontend Appearances:

Backend Settings:
5.2.4 Custom Menu - Top position
Frontend Appearances:

Backend Settings:
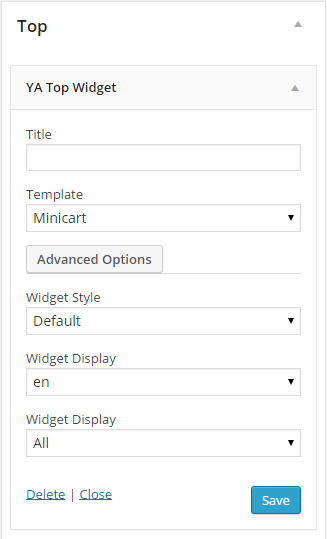
5.2.5 YA Top Widget (minicart) - Top Menu position
Frontend Appearances:
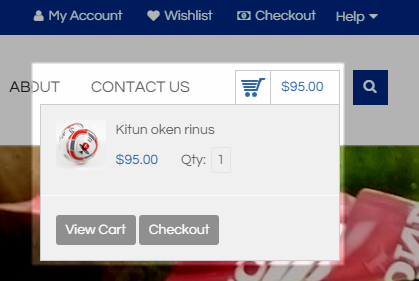
Backend Settings:
5.2.6 YA Top Widget (search) - Top Menu position
Frontend Appearances:

Backend Settings:
5.2.7 Revolution Slider - Banner position
Frontend Appearances:

Backend Settings:
5.2.8 Revolution Slider - Banner position
Frontend Appearances:
Backend Settings:
5.2.9 Text - Banner position
Frontend Appearances:

Backend Settings:
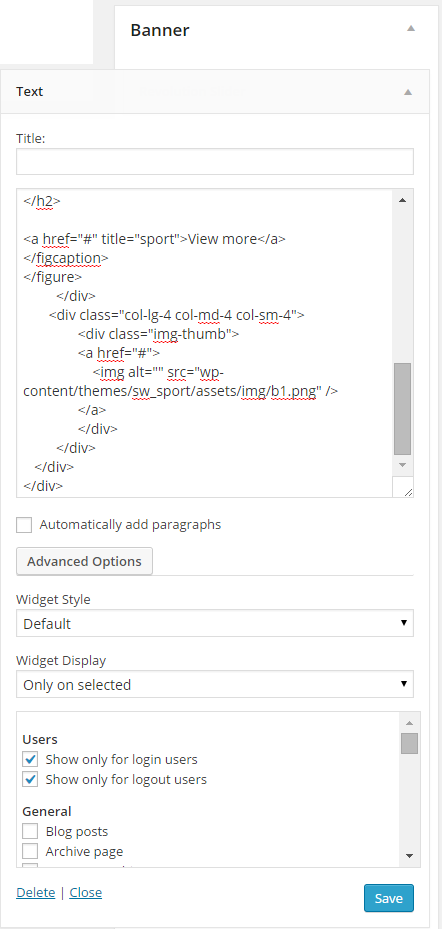
Copy and Paste the Code Custom HTML of Text :
|
1
2
3
4
5
6
7
8
9
10
11
12
13
14
15
16
17
18
19
20
21
22
23
24
25
26
27
28
29
30
31
32
33
34
35
36
37
38
39
|
<div class="w-advance container">
<div class="row">
<div class="col-lg-4 col-md-4 col-sm-4">
<figure class="effect-layla">
<a href="#" >
<img src="wp-content/themes/sw_sport/assets/img/b1.jpg" alt="sport"/>
</a>
<figcaption>
<h2>Duis irure dolor</h2>
<h3>Only 199,00 $</h3>
<p>Discount 30 %</p>
<a class="title_slider_shop" href="#">
Shop Now
</a>
</figcaption>
</figure>
</div>
<div class="col-lg-4 col-md-4 col-sm-4">
<figure class="effect-oscar">
<img alt="sport" src="wp-content/themes/sw_sport/assets/img/b2.jpg" />
<figcaption>
<h2 class="title-banner2">
Golf Gear Deals
</h2>
<a href="#" title="sport">View more</a>
</figcaption>
</figure>
</div>
<div class="col-lg-4 col-md-4 col-sm-4">
<div class="img-thumb">
<a href="#">
<img alt="" src="wp-content/themes/sw_sport/assets/img/b1.png" />
</a>
</div>
</div>
</div>
</div>
|
5.2.10 Sw Woocommerce Listing Ajax: New Products - Above Main position
Frontend Appearances:
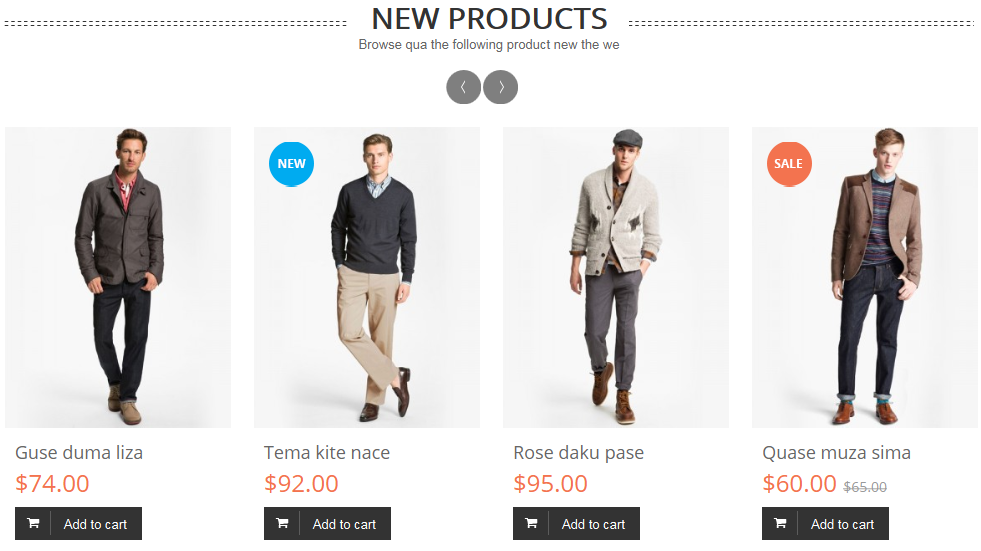
Backend Settings:

5.2.11 Text - Above Main position
Frontend Appearances:

Backend Settings:
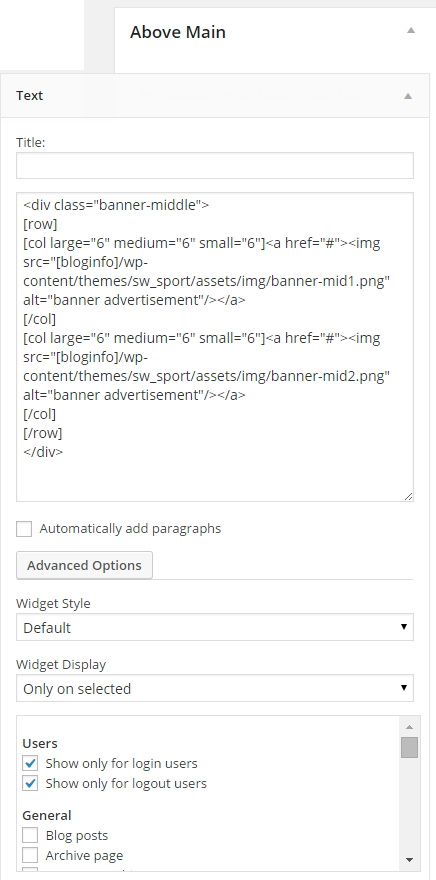
Copy and Paste the Code Custom HTML of Text :
|
1
2
3
4
5
6
7
8
|
<div class="banner-middle">
[row]
[col large="6" medium="6" small="6"]<a href="#"><img src="[bloginfo]/wp-content/themes/sw_sport/assets/img/banner-mid1.png" alt="banner advertisement"/></a>
[/col]
[col large="6" medium="6" small="6"]<a href="#"><img src="[bloginfo]/wp-content/themes/sw_sport/assets/img/banner-mid2.png" alt="banner advertisement"/></a>
[/col]
[/row]
</div>
|
5.2.12 Sw Woocommerce Listing Ajax: Best Seller - Above Main position
Frontend Appearances:
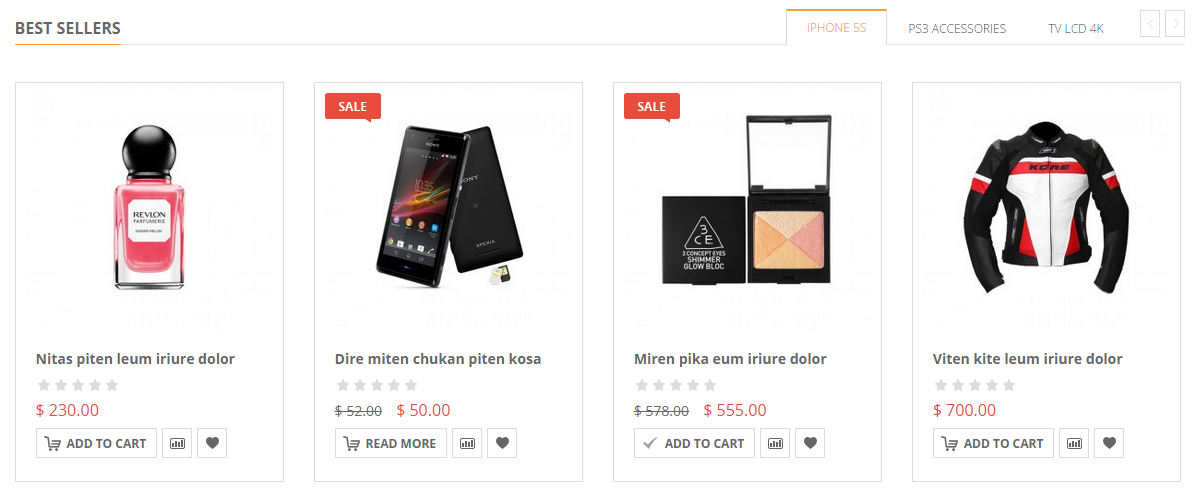
Backend Settings:

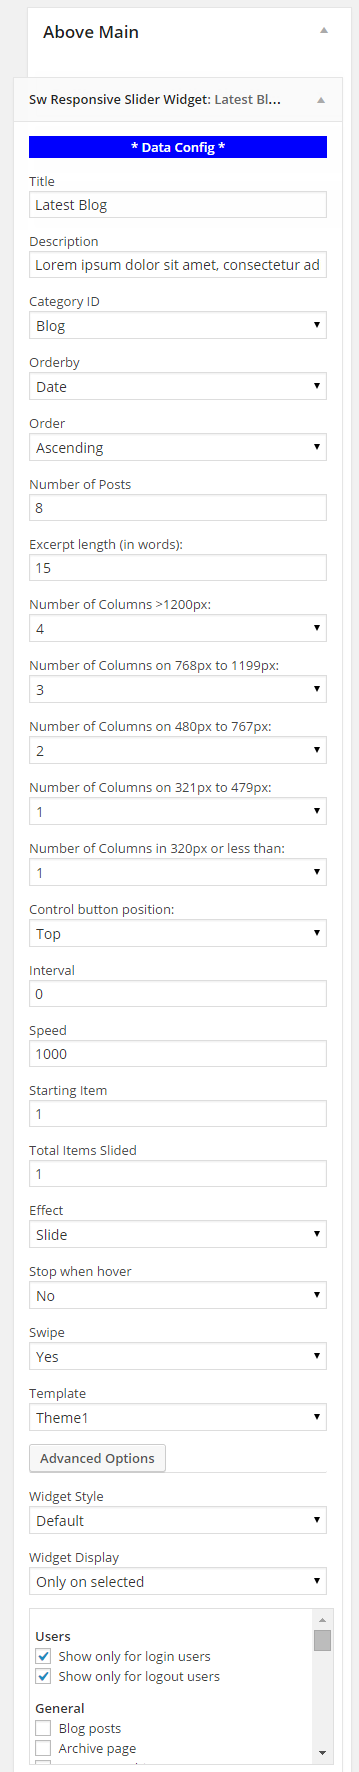
5.2.13 Sw Responsive Slider Widget: Latest Blog - Above Main position
Frontend Appearances:
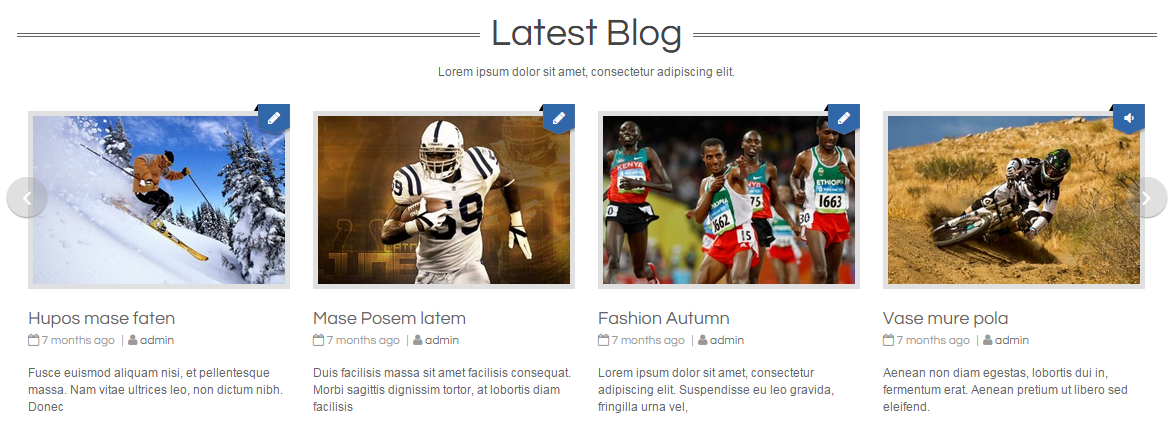
Backend Settings:
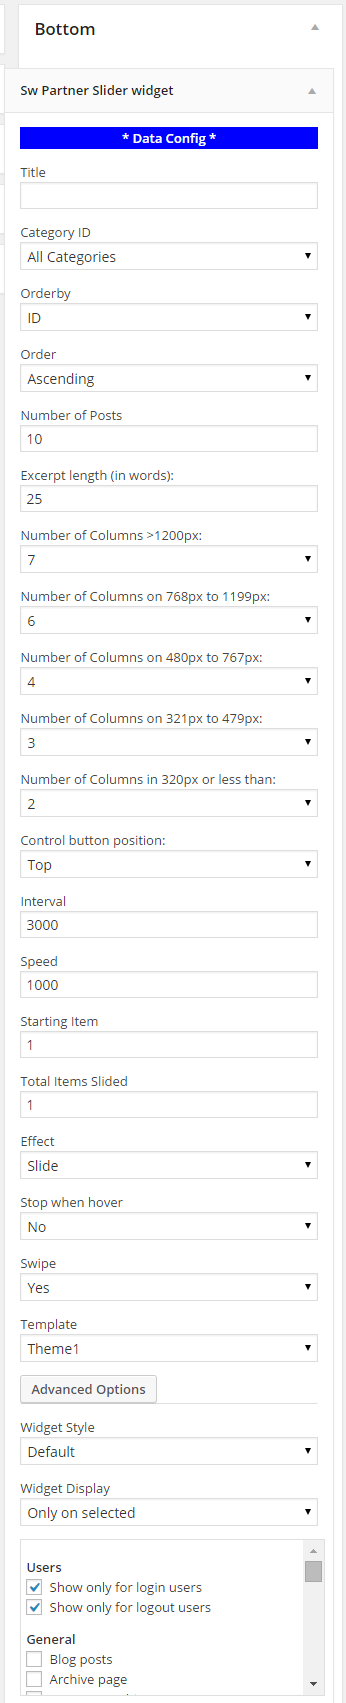
5.2.14 Sw Partner Slider Widget - Bottom position
Frontend Appearances:

Backend Settings:
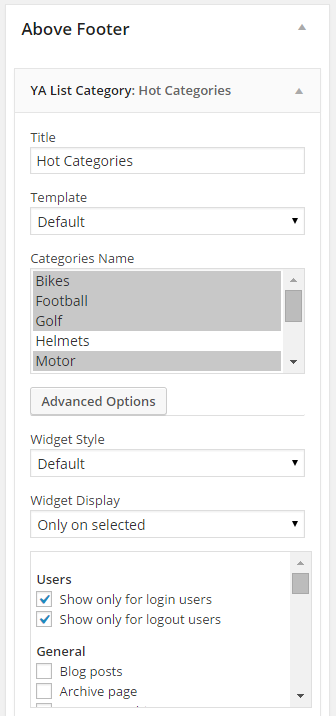
5.2.15 YA List Category: Hot Categories - Above Footer position
Frontend Appearances:
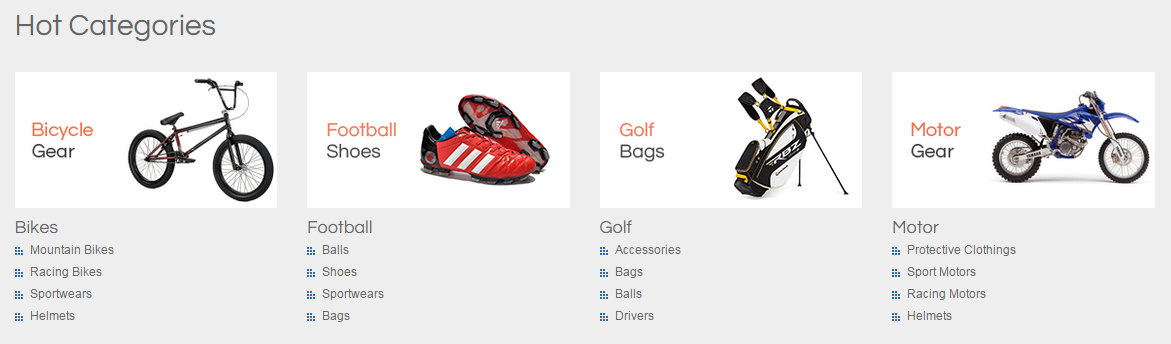
Backend Settings:
5.2.16 YA List Category: Hot Categories - Above Footer position
Frontend Appearances:
Backend Settings:
5.2.17 Text - Above Footer position
Frontend Appearances:

Backend Settings:
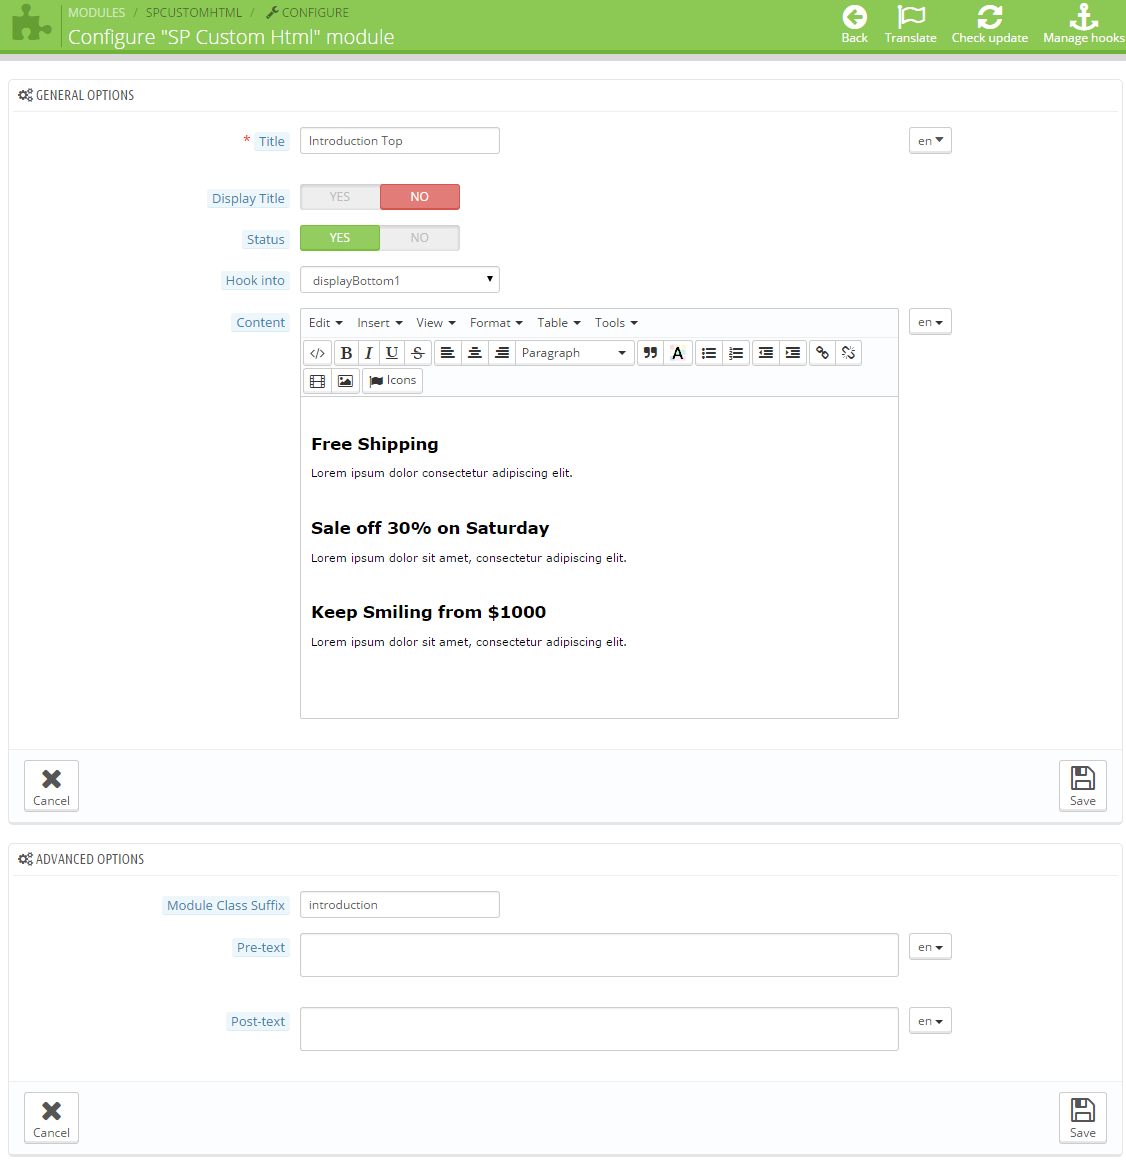
Copy and Paste the Code Custom HTML of Text :
|
1
2
3
4
5
6
7
8
9
10
11
12
13
14
15
16
17
|
<div class="free-shipping">
<h3 class="shipping-title">Free Shipping</h3>
<div class="shipping-content">
<div class="shipping">
<i class="icon-truck"></i>
<p>The idea behind this distinctive new statement piece is to fully embrace seasonal theme of ’Tour de Nerd’… only a true nerd would feel the need to take their own seat with him or her! This bag combines the new.</p>
<br>
<ul class="method list-inline" >
<li class="first"><a href="#" class="paypal-1" title="paypal"><img src="wp-content/themes/sw_sport/assets/img/paypal.png" alt="" /></a></li>
<li><a href="#" class="paypal-2" title="master"><img src="wp-content/themes/sw_sport/assets/img/master.png" alt="" /></a></li>
<li><a href="#" class="paypal-3" title="bank"><img src="wp-content/themes/sw_sport/assets/img/amex.png" alt="" /></a></li>
<li><a href="#" class="visa" title="visa"><img src="wp-content/themes/sw_sport/assets/img/visa.png" alt=""/></a></li>
</ul>
</div>
</div>
</div>
|
5.2.18 Recent Tweets: From Tweets - Above Footer position
Frontend Appearances:

Backend Settings:
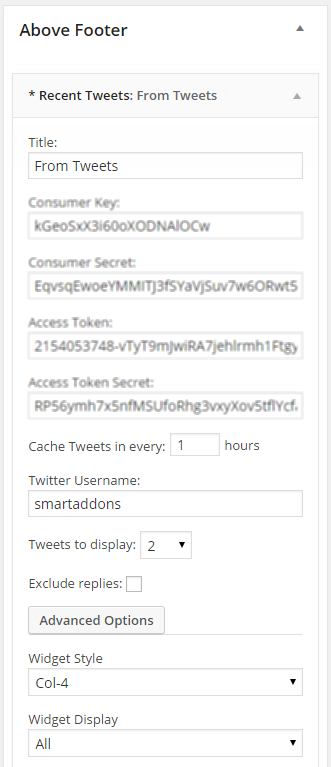
NOTE: How To Get Consumer Key and Consumer Secret on Twitter Click Here to view detail.
5.2.19 Text - Above Footer position - Above Footer position
Frontend Appearances:

Backend Settings:
Copy and Paste the Code Custom HTML of Text :
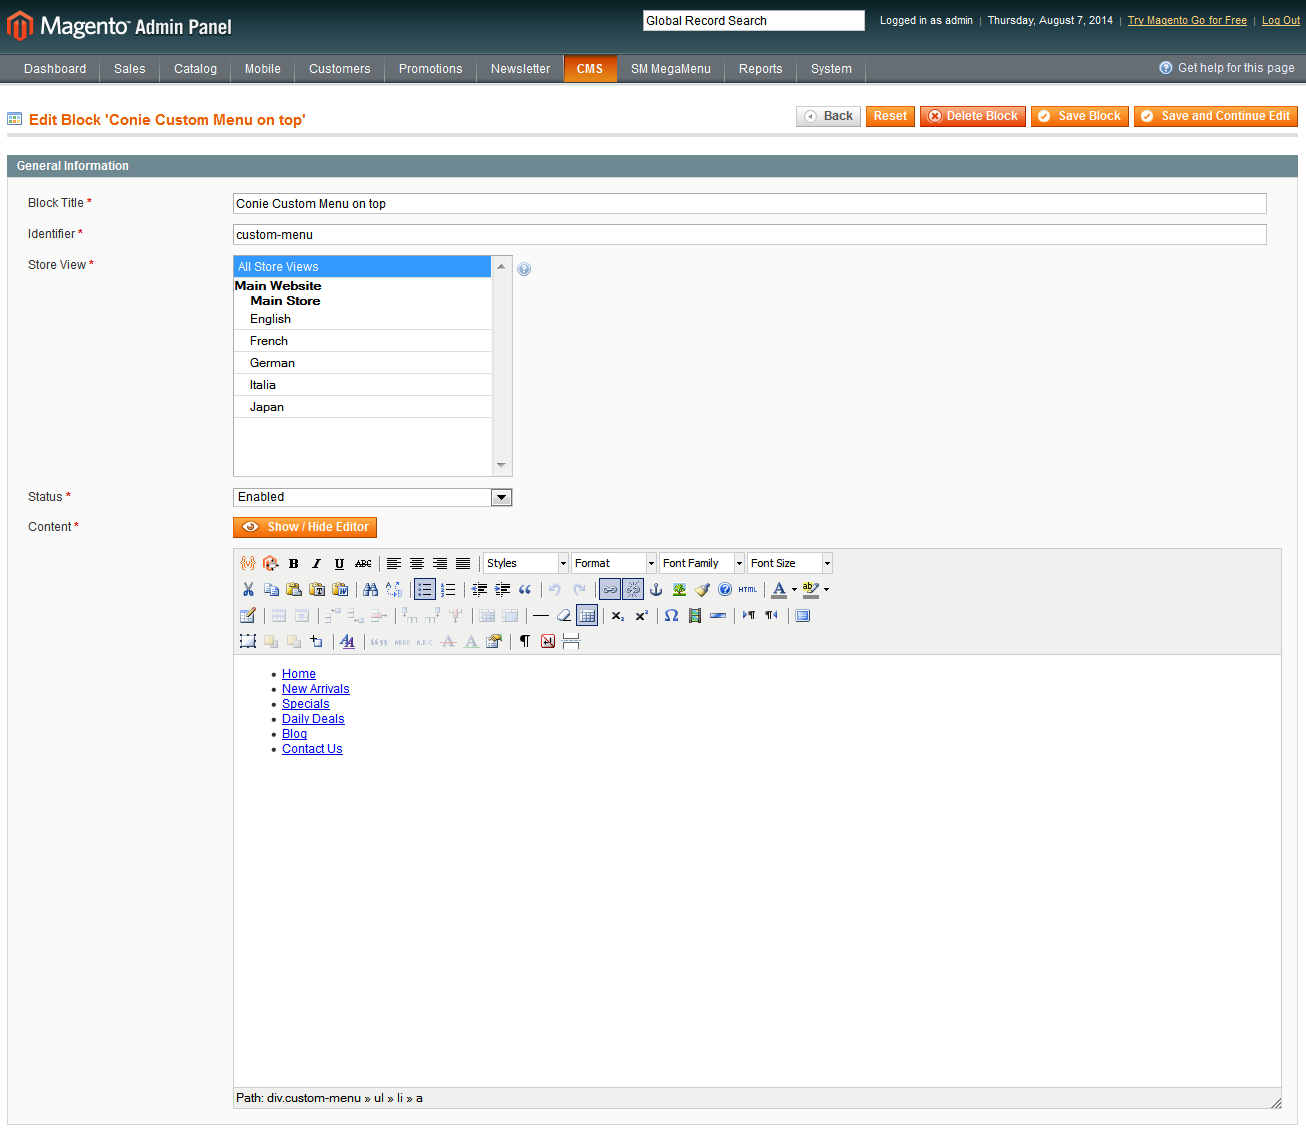
5.2.20 Custom Menu: Get help - Bottom position
Frontend Appearances:
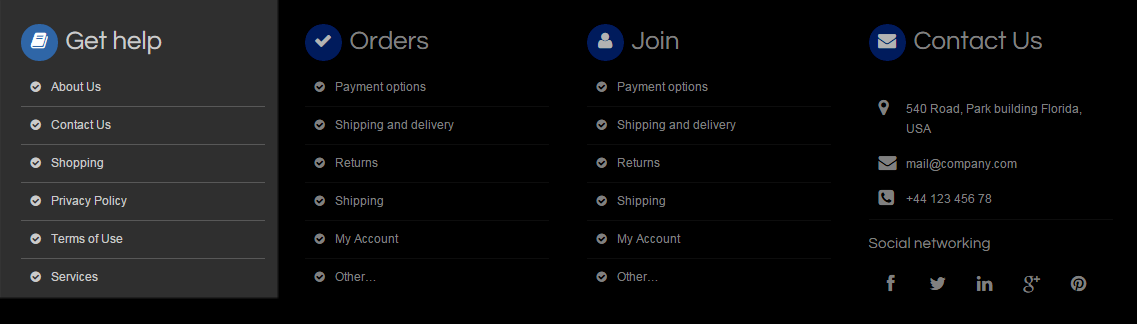
Backend Settings:
/custom-menu.png)
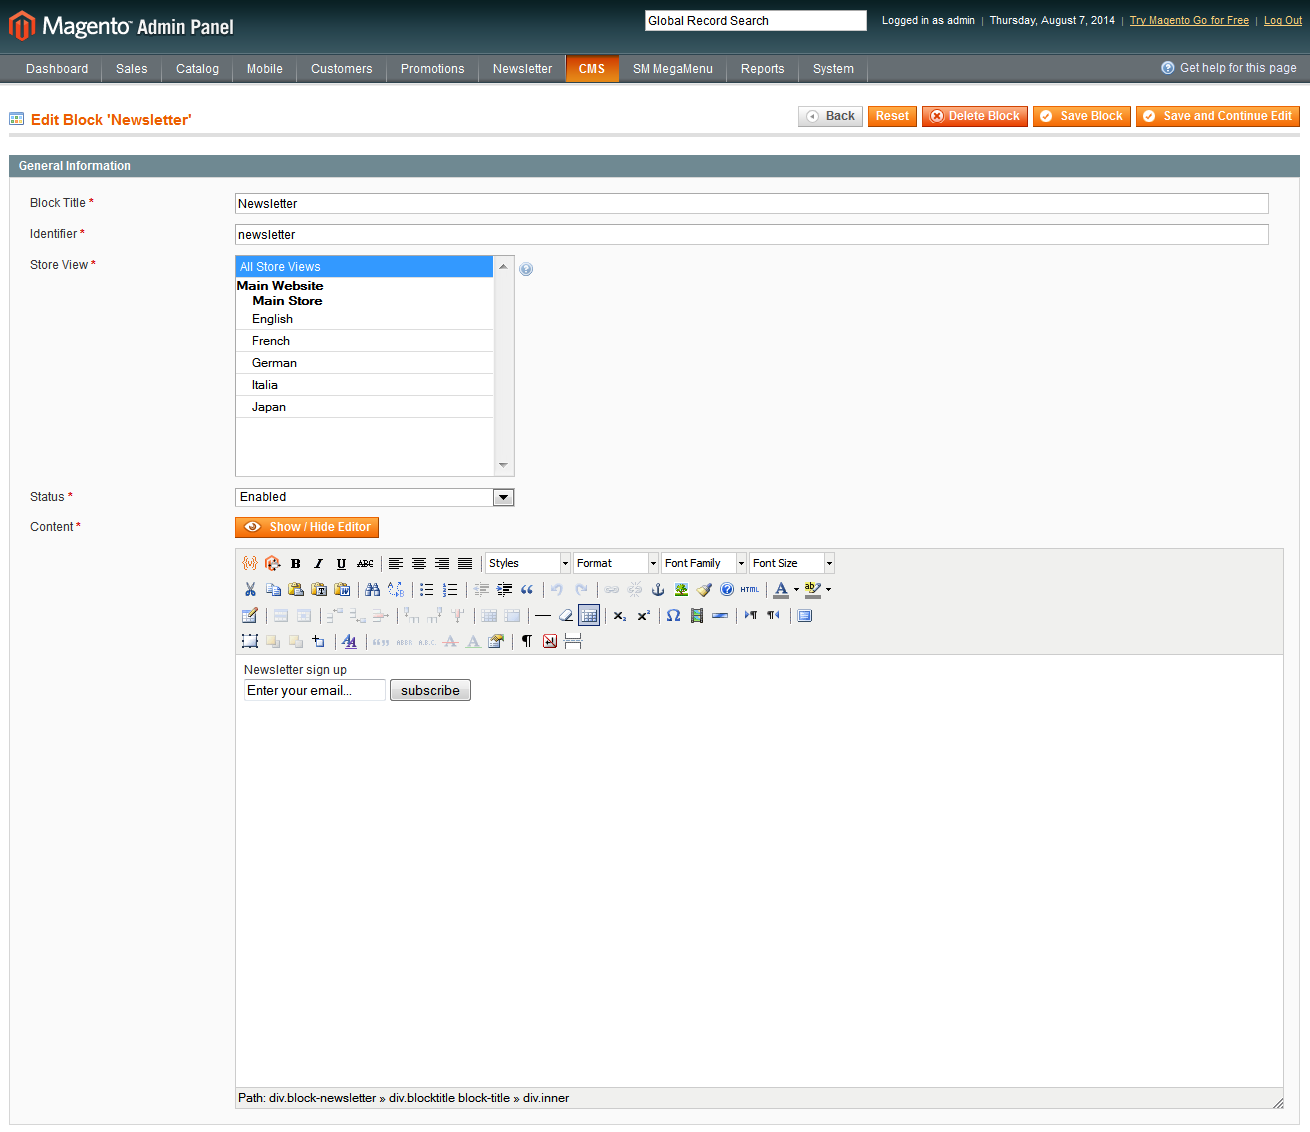
5.2.21 Text: Contact Us - Bottom position
Frontend Appearances:

Backend Settings:
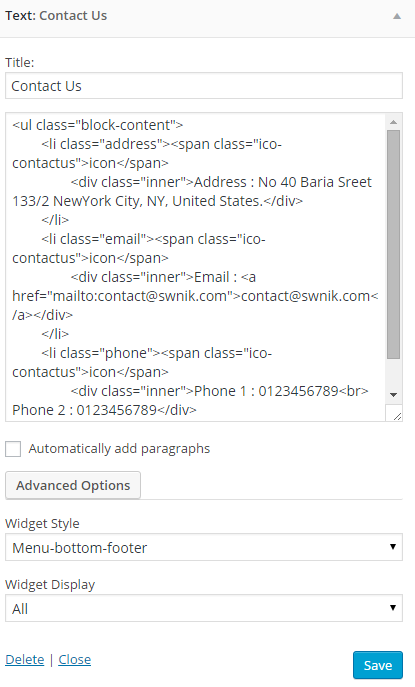
Code Custom HTML of Text :
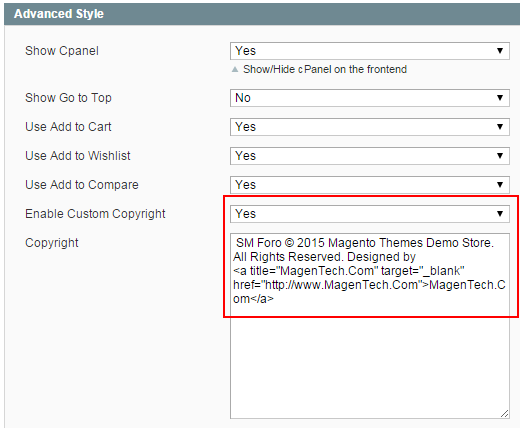
5.2.22 Custom Menu - Copyright position
Frontend Appearances:

Backend Settings:
7SUPPORT – Back to top
Thank you so much for purchasing this theme. If you have any questions that are beyond the scope of this help file, please send us via: Support Tickets System
Thanks so much!